Windows 11 clean installation refers to the process of installing the Windows 11 operating system on a computer’s hard drive or storage device without preserving any existing files, applications, or settings. It involves formatting the hard drive and removing all the data and configurations, essentially starting with a fresh and empty installation of the operating system.
When you perform a clean installation, you essentially start from scratch, and all your previous data, applications, and settings are deleted. This can be useful in several scenarios, such as when you want to:
Upgrade to a new version of Windows: Performing a Windows 11 clean installation ensures that the new operating system is installed on a clean slate, without any conflicts or remnants from the previous version.
Resolve System Issues: If your computer is experiencing persistent problems or performance issues, aWindows 11 Clean Installation can help by removing any corrupted files or settings that may be causing the issues.
Remove Malware or Viruses: If your computer is infected with malware or viruses that are difficult to remove using traditional methods, a clean installation can be an effective way to eliminate them completely.
Start Fresh: Some users prefer to periodically perform a Windows 11 Clean Installation to start with a clean and optimized system, removing any unnecessary files, applications, or clutter that may have accumulated over time.
It’s important to note that performing a clean installation will erase all the data on your computer’s hard drive, so it’s crucial to back up any important files and settings before proceeding. Additionally, you will need to reinstall all your applications and drivers after the clean installation is complete.
Table of Contents
Windows 11 Clean Installation; follow these steps:
- Backup Your Data: Before proceeding with a Windows 11 Clean Installation, it’s essential to back up all your important files, folders, and settings to an external storage device or cloud storage service.
- Create Installation Media: You’ll need a USB flash drive with at least 8 GB of storage to create a bootable installation media. Go to the Microsoft website and download the Windows 11 ISO file using the Media Creation Tool.
- Connect the USB Drive: Insert the USB drive into your computer’s USB port.
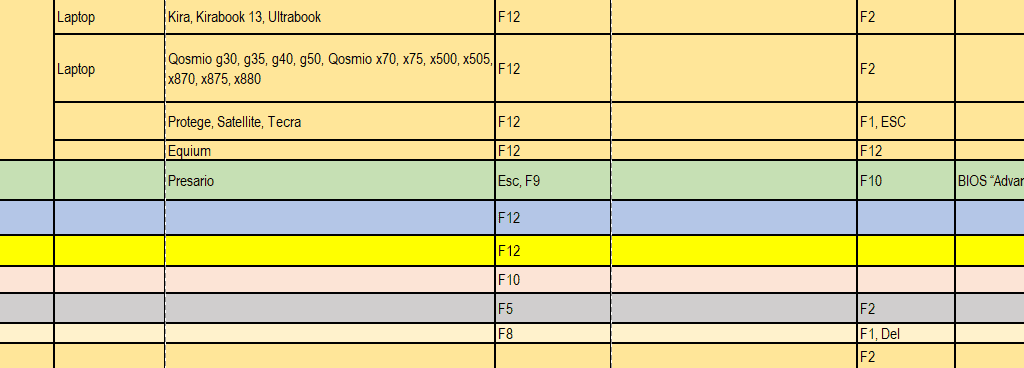
- Access the BIOS/UEFI Settings: Restart your computer and access the BIOS or UEFI settings. The process may vary depending on your computer manufacturer, so check your computer’s manual for instructions. Usually, it would be best if you pressed a specific key (such as F2, Del, or Esc) during startup to enter the BIOS/UEFI settings.
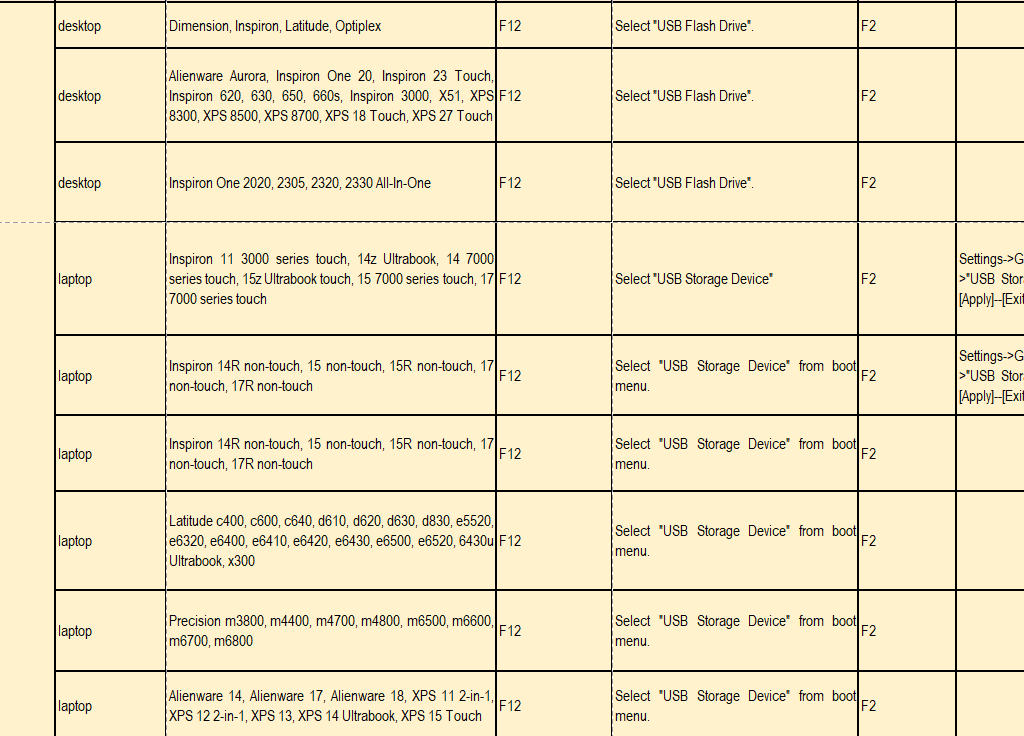

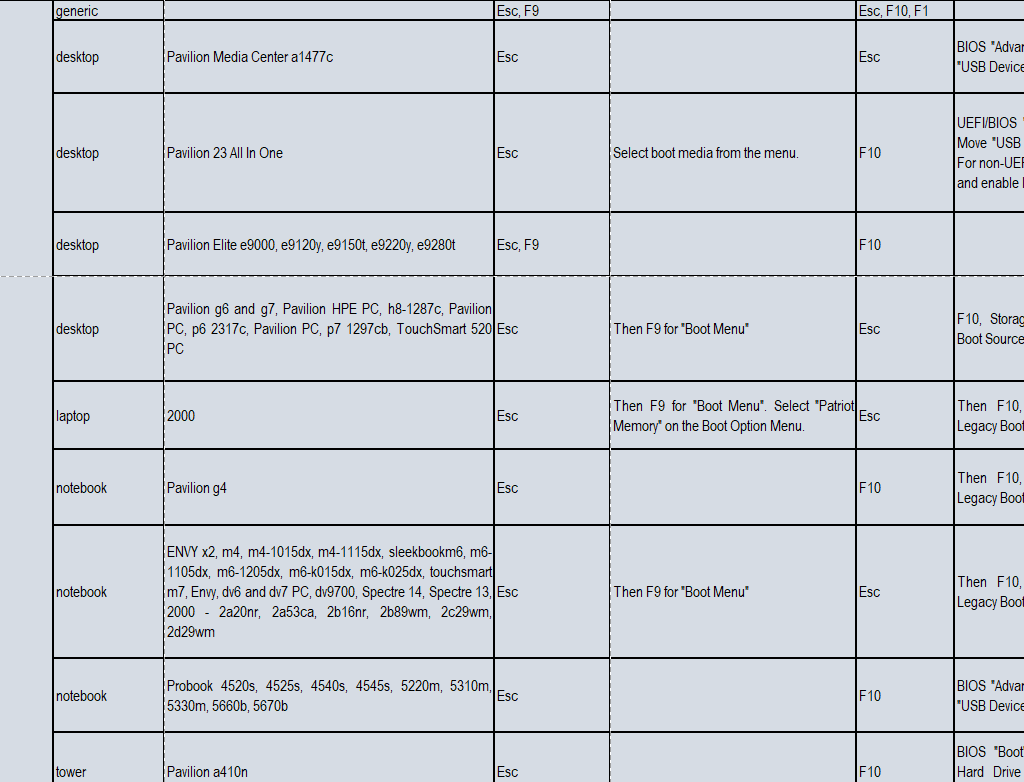
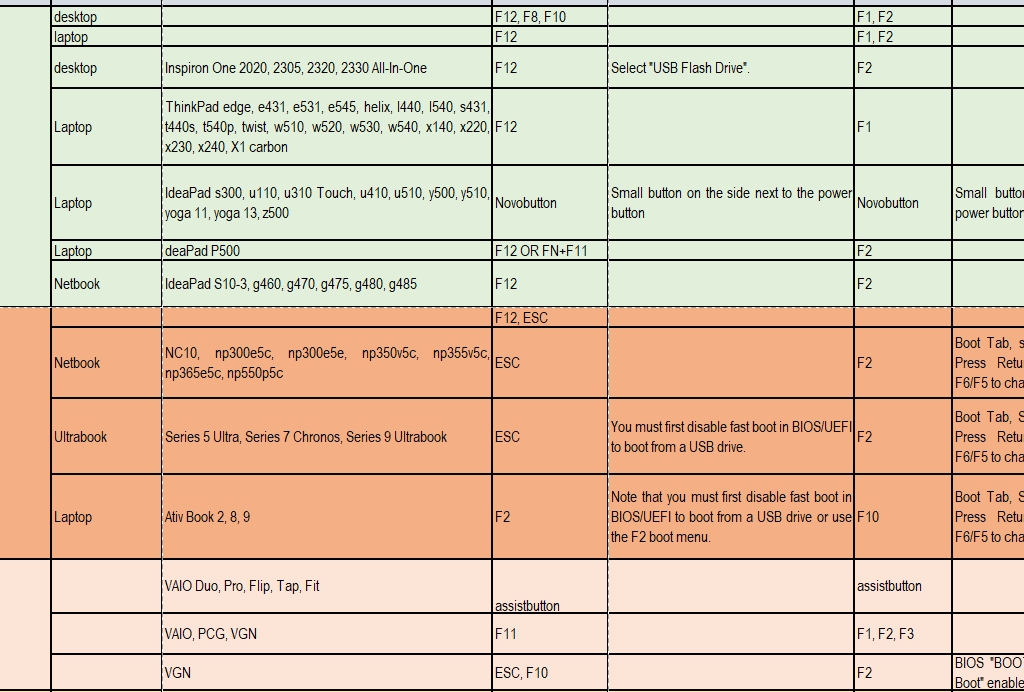
- Set Boot Priority: In the BIOS/UEFI settings, navigate to the Boot or Startup section and set the USB drive as the first boot priority.
- Save Changes and Exit: Save the changes you made to the BIOS/UEFI settings and exit. Your computer will restart.
- Install Windows 11: After restarting, your computer will boot from the USB drive. Follow the on-screen prompts to start the Windows 11 installation process. Select your language, time zone, and keyboard layout preferences.
- Enter Product Key: If prompted, enter the product key for your Windows 11 edition. You can usually find it on the packaging or in the email you received when purchasing Windows 11.
- Choose Installation Type: When prompted to choose the installation type, select “Custom: Install Windows only (advanced).” This option allows you to perform a clean installation by deleting existing partitions.
- Delete Partitions: In the next window, you’ll see a list of existing partitions on your hard drive. Select each partition and click “Delete” until you’re left with unallocated space.
- Install Windows 11: Select the unallocated space and click “Next.” Windows 11 will start installing on your computer.
- Follow Setup Prompts: Follow the on-screen prompts to customize your Windows 11 installation. This includes choosing your region, signing in with a Microsoft account (or creating a new one), setting privacy preferences, and accepting the license terms.
- Complete the Installation: Windows 11 will finalize the installation and prepare your desktop once the setup is complete.
- Install Drivers and Software: After the installation, you may need to install drivers for the hardware and software applications you use regularly. Visit the manufacturer’s website for each device to download the latest drivers.
- Restore Your Data: Finally, restore your backed-up files and settings to your newly installed Windows 11 system.
Note: Remember, performing a Windows 11 Clean Installation will erase all data on your computer’s hard drive, so make sure to back up anything you want to keep before starting the process.